My very Professional (not!) photo shoot and final picture How-To
Sunday, May 22, 2011
I haven't had much opportunity to use the new tripod, so yesterday I decided to use the potted Campanula Get Mee's (ok, I didn't know this, I read the label) I picked up at the store last week and take some close-ups.
I love this texture tutorial at the Flypaper Textures site and wanted to see if I can get similar results using my own textures. Well, I didn't really have any of my own textures yet; I just started creating my own and the few I have were more of the darker/grungy variety, so they wouldn't work for this light, dreamy type of look.
Well, not to worry, being the Packrat that I am, which, in photography, translates into my having a hard time rejecting and deleting any bad or blurry shots without thinking "hmmm, if I just use this corner of the picture, I can get some cool background/texture, etc. which I can then use for something else", I had just that--some really nice, dreamy, blurry, colorful parts of otherwise less than optimal (i.e. crappy) shots.
This is what the finished picture looks like.
If you'd like to know how I did it, read on:
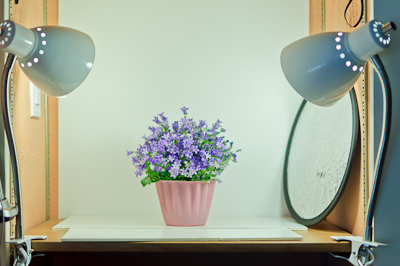
The first picture shows my studio (hehehe), well, actually, it's a cleared off shelf with two desk lamps, a small reflector and some white posterboard. The second one is SOOC (straight out of camera- 1/60, f5.6, ISO 200) with some basic Lightroom adjustments, like Lens Correction, Sharpening and Noise Reduction.


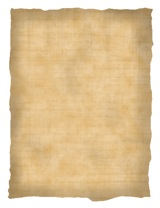
Now, it's just a matter of adding your textures to a new layer, changing the blend mode and opacity, and masking out the parts you want to stand out. The steps for this are pretty much the same, except of course the percentage of opacity and the blend mode. Repeat Steps 1 through 6 for each texture:
- Open the first Texture file and move it to your flower picture like this:
- Select the move tool
- Left-cllick and hold your mouse to select the texture and drag it to your other document. If you have your documents open in side-by-side tabs, just hover your mouse (still clicking and holding) over the name of your flower picture until you see the flower picture.
- Now, hold down the Shift key and let go of the mouse button (and then the Shift key). The extra step of holding the Shift key ensures that your texture lands on the new layer centered.
- Once the texture is on a new layer, press Command-T on a MAC (Ctr-T on a PC) to get the free transform tool.
- Adjust the size of the texture (bigger or smaller), no need to use the Shift key to make the sizing proportional, as the texture will blend in anyway. Double-click inside the selection or click the checkmark in the menu bar to commit the change.
- Now, change the blend mode and opacity to taste. It really is a matter of preference. See the screen-grab of my layers below for the settings I used. I labeled the layers with the name of the Texture file, the blend mode and the opacity. If there is no opacity listed, I left it at 100%.
- Now, add a Layer Mask to the texture layer. In PS, it's the third icon from the left at the bottom of the Layer's panel.
- Select a soft brush with a low opacity (about 30%), and with black, paint back the areas you want to show. Start with a low opacity, so you can go over several times without creating hash edges. If you have different foreground and background colors, just press the D key (for the default black/white combination)
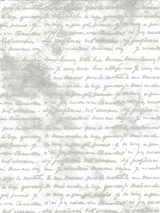
- After you load the FrenchScript texture, add a color overlay by clicking on the Black and White Circle on the bottom of the Layers Panel and select Solid Color. Pick a warm color to fit your image, I used #eebfa2. Change the Blend mode for this layer to Multiply.
- Now, select the color overlay layer and the French Script layer, right-click and select Merge Layers.
- We'll need to bring back the part of the image you want to show. To save yourself some work, you can copy the layer mask from the Silverbell layer by holding down the Option key (Alt on PC), clicking on the layer mask and dragging it to the new merged layer.
- I just wanted a basic canvas texture to give a little painterly feel to the image, so rather than looking through my collection of texture files, I did a quick-n-dirty. Here's how:
- Create a new Layer.
- Fill with 50% gray (Shift-Delete, select 50% gray, click ok)
- Add a Layer Style by clicking the fx icon at the bottom of the Layers Panel and select Bevel and Emboss:
- Inner Bevel, Direction-Up, Size- 1px
- Texture: Dark Coarse Weave (scale 99%, Depth +50% (It's one of the default textures-Artist Surfaces)
- Add a Layer Mask and with a black soft brush, mask out the part of the picture you want to show through the texture.
- For the Vignette, I used the Dirty Action from MCP's All In the Details Set, but you can get a similar look by following these steps:
- Click on the Black and White Circle on the bottom of the Layers Panel and select Solid Color.
- Select a color for your vignette, I picked a warm brown tone (#714a06)
- At this point your picture will be completely covered by the brown layer--don't panic, we'll fix it next.
- Add a layer mask and click on the rectangular marquee tool. Make sure your foreground color is black. If it isn't, press the D key to select the default colors.
- Set the Feather Value in the Menu Bar to 250.
- Now draw a rectangle inside the layer, leaving a small margin all around.
- Press Option-Delete on a MAC (or Alt-backspace on a PC) and then press Cmd-D on a MAC (Ctrl-D on PC) to de-select.
- Now, select Filter...Blur...Gaussian Blur from the Menu bar.
- Set the value at about 70 and click ok.
- If it looks to dark for you, adjust the opacity to about 85%.
And that's it! Make sure you save your document after all that work. I save both the PSD and then save as JPG.


1 awesome comments:
Fascinating! Just learning photoshop- and you are showing me lots of possibilities! Very creative! And I like your results!
Post a Comment